I've been neglectful. There is no real good excuse. I guess that happens when there are things I'd rather be doing than blogging.
Since last I left quite a bit has happened. I've started offering silk fiber rings with semi-precious stones instead of exclusively offering cotton, I've sent rings to both France and Australia, and some of my work has been included in Etsy treasuries (like
this one today). I haven't had very many sales but it's still keeping me occupied while I continue searching for a job.
I also finished a prototype for a shirt today, I'm thinking of starting another shop to sell clothing I've designed myself. The shirt I've made is a peasant blouse with a drawstring neckline and sleeves, 6 copper colored grommets and cotton drawstrings. Since it's a prototype I used some fabric I've had forever but which I bought very cheaply, it's a crinkly dark sage green that I think is a cotton-poly blend (I haven't done a burn test to see). I like the crinkly texture the fabric has, I'll have to post and picture of it soon, I hope I can find a good source of a similar type fabric. It would work well for an undershirt for a medieval, steampunk or a regular shirt for everyday wear. It has potential. The next thing I want to work on will either be a vest, a skirt or a pair of knickerbockers. I'm drawn to the steampunk aesthetic.
So, way back when I was talking about posting a tutorial for making sock puppets like the one I made for the Ingrid Michaelsock contest. I'm going to go ahead and post it in parts and start right now.
My brother fixed our internet so I should be able to post pictures now without crashing the network and making my roommates grumpy.
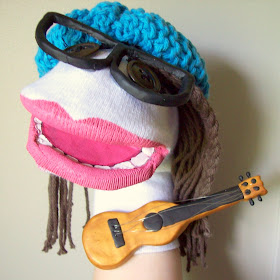
I'm going to show you how to make sock puppets like these (the video was last minute improv so please excuse the lack of quality storyline):
Yay, the video upload worked without the internet dying!
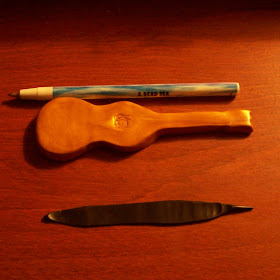
Before you start chopping up socks you'll need some materials: a sock no one is going to miss, a hot glue gun, some light cardboard (cereal boxes work great for this), some acrylic paint, yarn for hair, buttons for eyes and some scrap fabric. Accessories can be made out of polymer clay (Ingrid's ukulele was fashioned out of it), paper, fabric, pipe cleaners or whatever you want. Feel free to change anything up, that's part of the fun.
The first thing I did was start with the mouth since my sock puppet philosophy is geared towards range of expression. Usually the only moving part of a sock puppet is the mouth with some bobbing or turning of the head so I wanted to make sure the mouth was really able to open as wide or narrow as I wanted. I figured I couldn't do much with the eyes or eyebrows so getting the mouth right was very important to me.
I put a folded in half piece of cereal box cardboard between my thumb and all my fingers (in the sock puppet hand stance, if you get what I mean) and guess-timated how wide I wanted the cardboard to be for my hand to be able to fit comfortably. I then marked the cardboard haphazardly while it was still in my clutches so I would know about how wide I wanted it and everything. After that I drew lines from the crease to the haphazard marks and decided on accurate and standard measurements to go on (so I could make a pattern in case I wanted to make more later) and making a grid.
I basically eyeballed the curves. All of that was a complicated way of saying I drew an asymetrical pill shaped thing that's folded in half for the puppet mouth.
This is how it looks in its pill shape.
It looked like this when I was done:
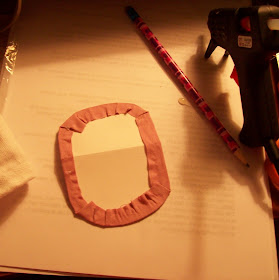
I traced around the mouth insert on some lightweight cardstock, I'll show you what that is for later. After that, I put the sock on and marked the little bit of overhang between my finger and socks with a pencil. I think it was about 1/4 of an inch. I then cut off that little bit (don't do that while still wearing the sock, it's not worth losing any fingers). The sock then looks like this:
Using the handy dandy glue gun, glue the sock onto the cardboard, don't worry too much about glue squishing past the sock fabric, it'll get coverd. When you're done it should look like this:
In my next post I'll show you what that cardstock copy I mentioned is for as well as how to do the mouths the way I did.


